The Library recently hosted a program on making your own Beeswax Wraps as part of our monthly series on DIY Homesteading.
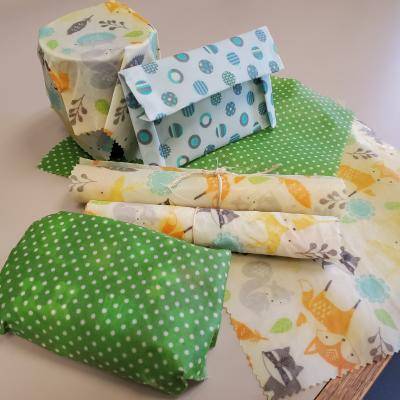
Beeswax wraps are basically a piece of cloth infused with beeswax. They are an alternative to plastic wrap, aluminum foil, and single use plastics like ziplock bags and containers. They are biodegradable, compostable and reusable, which makes them better for the environment. They are also breathable which allows food to stay fresh longer and reduces food waste. Studies have shown that beeswax wraps also have antibacterial properties which can prevent food spoilage.
Fun Fact: Ancient Egyptians used beeswax wraps in the 7th century.
Care Instructions:
- To make it pliable and sticky, warm with hands by crumpling into a ball.
Wash after each use and air dry. - If needed, can use mild soap and cold water.
- Revive by placing on a metal pan in the sun or using a blow dryer on. This will reheat the beeswax and redistribute it if cracks are forming.
- Use up to a year depending on how often they are used.
- When depleted, compost, use as a fire starter, or wash and use as a rag.
Ways to use:
- Cover leftovers in a container in the refrigerator
- Wrap half an onion/apple/lemon/etc. for later use
- Fold into a container for snacks or fruits like berries/grapes
- Wrap around a sandwich or leftovers to take in your lunch
- Wrap around a bar of soap when traveling
- Cover jars or bottles if you don’t have a lid
- Wrap a deck of cards up if you lost the box
- Cover bottles/pitchers outside to keep the bugs out
- Wrap a bouquet of flowers (two gifts in one!)
- Use as a grip to open a jar
- Wrap loaves of bread or bakery items
- Use as a funnel for filling jars and containers with dry goods
- Line refrigerator shelves for easy cleaning
Do Not:
- Do not use with raw meat or fish. (You can put those in a container and use to cover the container.)
- Do not use to cover hot food or bowls. (Wait until they are cool.)
- Do not use in the microwave.
Instructions for DIY Beeswax Wraps
Materials Needed:
- Beeswax pastilles or shredded beeswax if using a bar
- Pine rosin (adds pliability)
- Jojoba oil (makes fabric softer)
- 100% cotton fabric
- Iron and ironing board
- Parchment paper
- Old towel
- Small bowl (optional)
- Rolling pin or food processor (optional)
- Tin foil (optional)
- Pinking shears (optional)
Directions:
- Wash, dry, iron and cut your fabric using your pinking shears if you have them. The pinking shears keep the fabric from fraying.
- If you rosin came in chunks, use a rolling pin or food processor to crush it to powder.
- For a 9 x 11 piece of fabric, measure 1 ½ TBS beeswax, 1 tsp rosin, and approximately 15 drops of jojoba oil into a bowl. Mix together making sure you saturate the beeswax and rosin with the oil.
- Cover ironing board with old towel. Place parchment paper over towel. Lay piece of fabric on parchment paper.
- Cover iron with foil to protect it from wax. Use cotton setting on iron with no steam.
- Scatter the beeswax mixture evenly over the fabric. Place another piece of parchment paper on top.
- Iron over parchment paper covered fabric, running the iron up and down the fabric letting the beeswax melt. Start in the middle and work your way to the edges to make sure you have even coverage of beeswax. The fabric will look wet when all the beeswax is melted.
- When wax is melted, remove top sheet of parchment paper and peel up fabric. Allow to dry thoroughly before use.
- Store in a cool, dry place.
- Warm with hands by crumpling up into a ball to make pliable and sticky.